
I've been playing with 3d printing in PLA for a few years now on a Replicator 2. Great for bigger prints but a bit lacking for finer details. I'd seen how good resin prints can be so decided to give it a shot.
Recently I picked up a Phrozen Sonic Mini, as it's a fairly inexpensive way to try out resin printing and has gotten a lot of positive reviews. Requiring a bit more prep and maintanence than PLA but can give finer and more acurate results.
Since this is a learning experience for me I'll use this space to document and share my adventures. Including Links/Settings/tips etc. This may be of use for anyone with a curiosity to get into 3d printing.
I'd created my most recent work (Dragon Oni bust) with the intention to print. I will be using this as a test for the Sonic Mini.
- Initial ideas and References:
After some rough sculpting in zbrush I decided I wanted to make some kind of Samurai in traditional armour.
Since I'd begun sculpting some kind of demon head It was at this point I went with the Oni theme. I love the onimusha series so wanted to go with a more fantasy style character that might exist in that universe.
Here Is my initial Pure Ref board.

You can watch part 1/3 of my creation process here
Final Zbrush model: Decimated and rendered in Toolbag.


- Print Preperation:

- Print Setup
I used Chitubox to holo out the model and add supports. There is a bit of a learning curve to finding the right settings here as there can be a few variables that will have an effect on the succes of your print. How you setup the 1st few layers are important to make sure the resin sticks to the build plate and not the FEP film as well as having a balance between too many or too few supports.
Image from Chitubox

- Automatic vs Manual supports
I spent some time collecting information from various sources on best practices when adding supports. (Links bellow) basicly this will depend on what you plan to print i.e. overall size and amount of overhanging details etc. If you have time to fine tune then manual would seem to be the prefered method as you will both save resin overall and reduce the amount of clean up at the end. I chose to go part auto gererated then added or removed where I felt I could just to save time. Here are the settings I used.

There are some great resources on youtube to find out more info on printing setups.
Check out :
3DPrintFarm https://www.youtube.com/channel/UC5k3TJL8ud4jh7863gjywPQ
3DPrintingPro https://www.youtube.com/channel/UCbv2mDrRqXovPdahRyoCFhA
Another great tool for detecting any additional problem areas with supports is the Photon File Validator. Once your happy with your supports and cannot see any obvious issues with unsupported areas, then run the slicing tool and save the file as an .cbddlp load this into the file validator. It will automaticly anylize your model and detect any problems, Hit the fix button at the top to remove errors that are only a few pixels in diameter as these wont effect your print. Those issues that remain will give you a better indication of what needs to be fixed back in Chitubox. The great thing with this tool is that it displays which layer any problems accur on. So if you have 2 screens available its good to have both programs side by side so you can go layer by layer adding extra supports in chitubox.
Here the red indicates an unsuported area I missed. Manualy add extra supports in chitubox, in this case a couple of light supports were enough.

- Print settings (Chitubox)
Curing times for each resin type will also vary so its good to have an understanding of its properties etc. This info should be labled on which ever resin you have.You can find further info on various types of resins in combination with any given printer with some handy charts found online. here is an example. https://docs.google.com/spreadsheets/d/1q9wLP_N-beI9j9lXhaTTbQjc9Evu2JRr1Xeu7UV7gLM/edit?fbclid=IwAR1pQL8m4Eu7VhwauPLL3fLlRCWLAN1XVYNiNwsNtKr7RNIgLw-LduH5lTE#gid=2097766120
I've chosen to go with Elegoo ABS Like Grey. These are my print settings which worked fine for my final print with 0 issues.

Main things to watch for if your builds failing is to try giving more exposure time for the intial layers and also each subsequent layer. This will ensure the resin cures bonding to the build plate rather than the FEP sheet in the vat. I also reduced the lifting speed slightly to give more chance of the print not seperating from the plate. There's a bit of trial and error here which can be a bit overwhelming at first so take your time to find what works best for you.
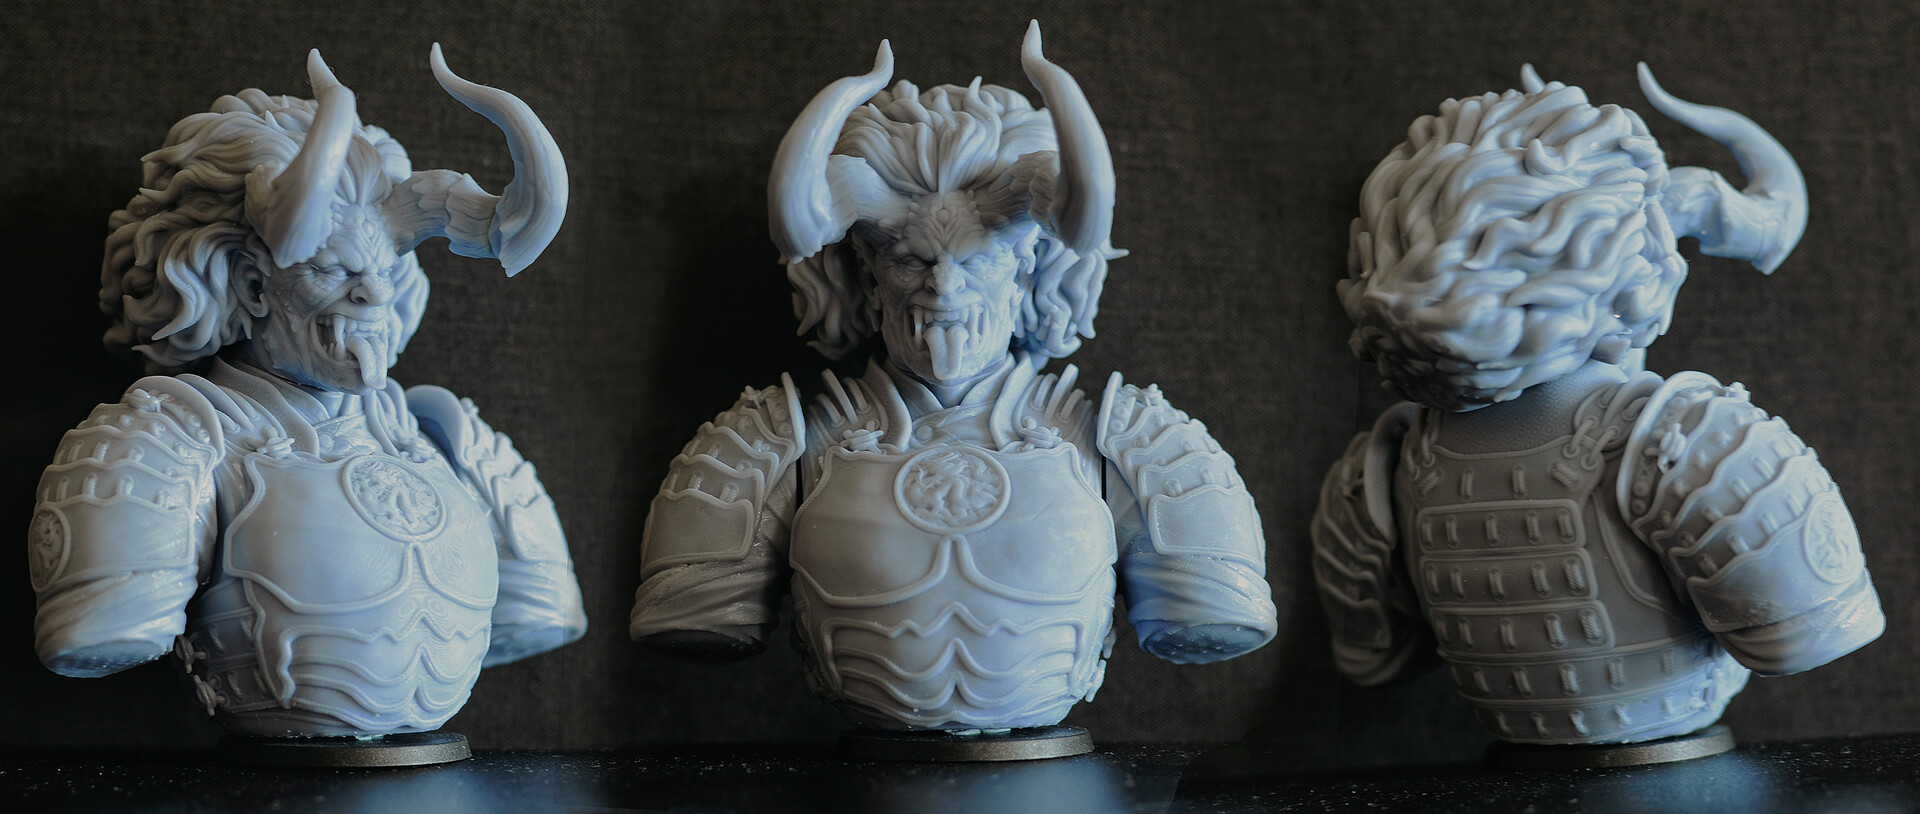
Here are few shots of the print in various stages.


Final assembled print


I'm really happy with the results, there are definatly things I'd try differently for the next model but overall the amount of detail I was ably to get at this scale is pretty crazy. Next I'll give it some paint and call it a day. I'll definitely be investing in a better camera though :D
- Extra stuff:
Aside from the printer you will need a few other bits and peices. Since resin is toxic its advisable to pick up some protective and cleaning equipment.
Here are a few must haves:
https://www.windowscentral.com/must-have-3d-printing-accessories-resin-printers